Getting Started with your Compact Arduino Nano-compatible with USB C
This is a quick guide for the Arduino user who is new to our Compact Arduino Nano-compatible with USB C development boards.
Are you new to the world of Arduino? Order the book "Arduino Workshop" to get started!
Hardware
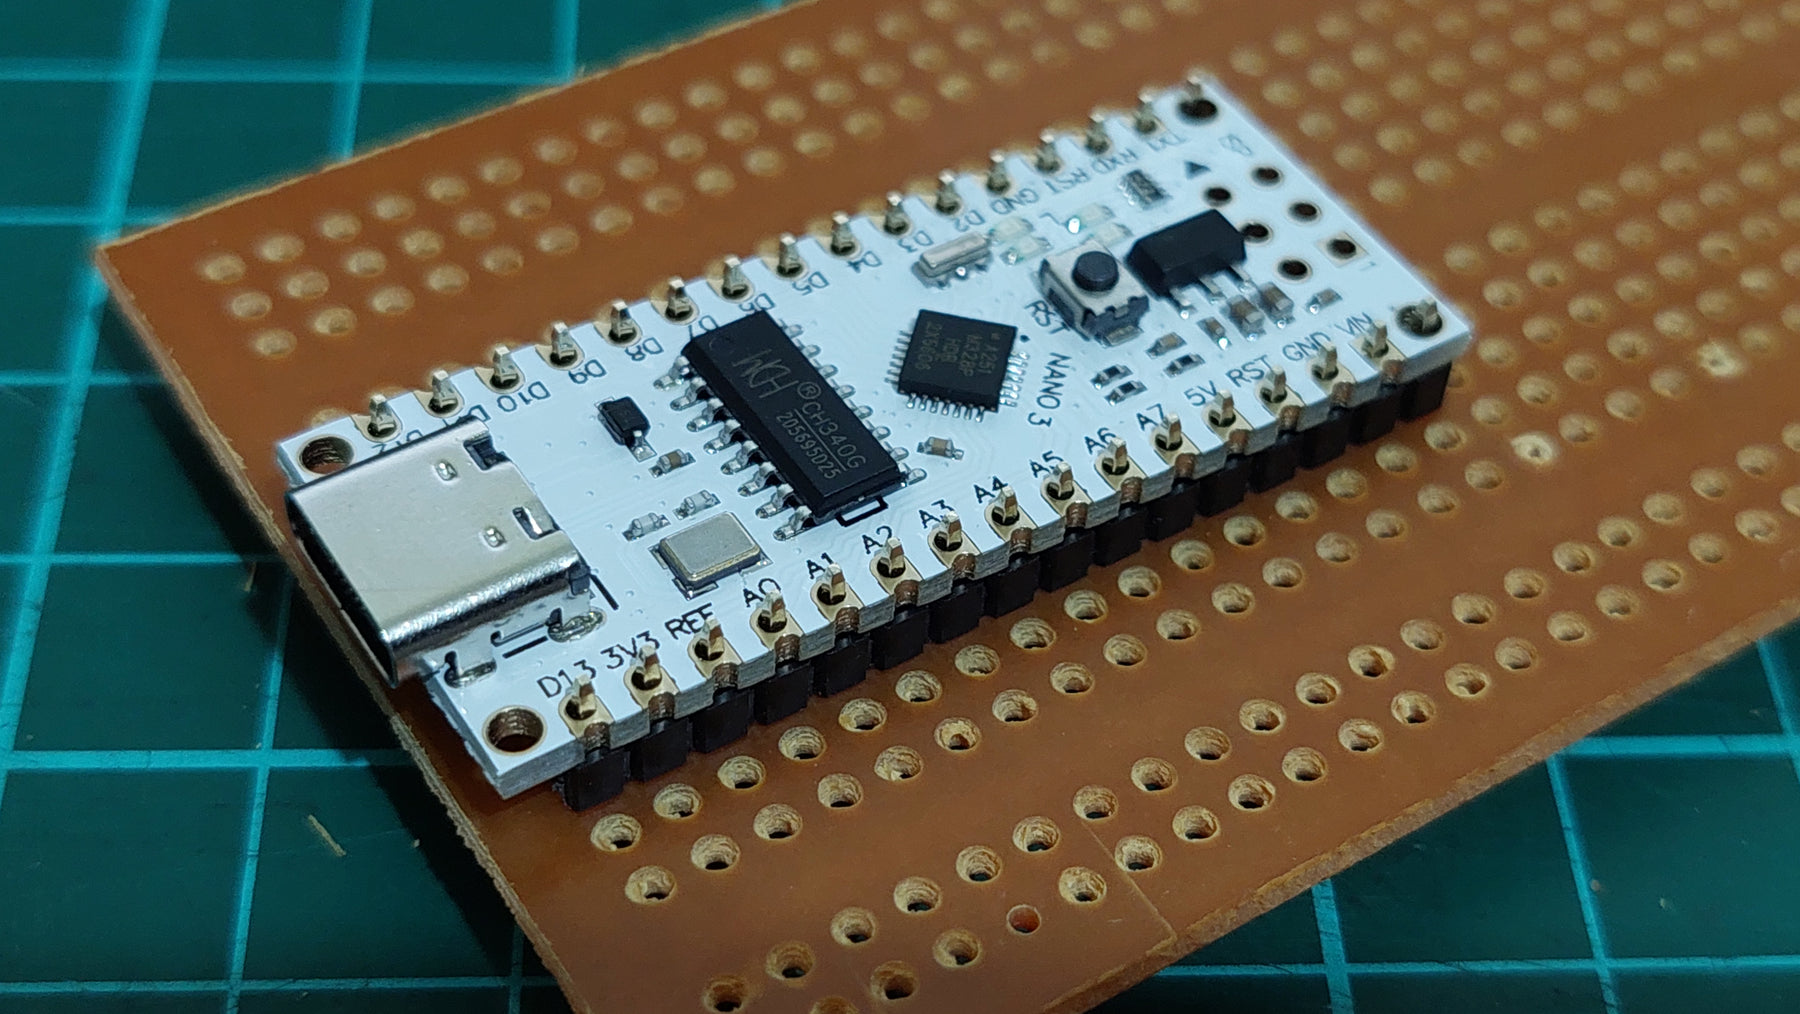
Based on the Microchip (formerly Atmel) ATmega328P microcontroller, these boards give you the flexibility of the Arduino development environment in a very compact, yet usable form factor:

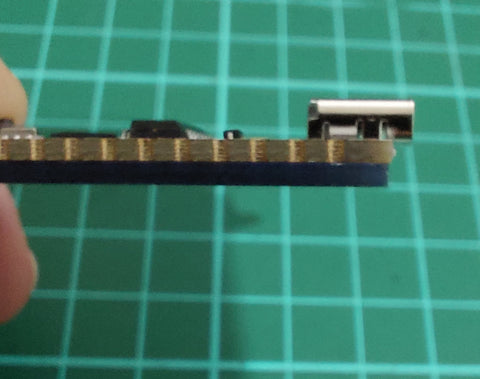
Unlike other Nano-compatible boards, this unit has a flat bottom side, without any components:

The USB C socket just peeks out over one side. The benefits of having a flat bottom are twofold at least - if you make your own PCB you can drop this in as a through-hole or SMD component (by soldering via the castellations along each side) and the board will be flush with your PCB:
Or you can mount the PCB on your own stripboard or prototyping board, or solder inline header pins and drop it into a solderless breadboard:

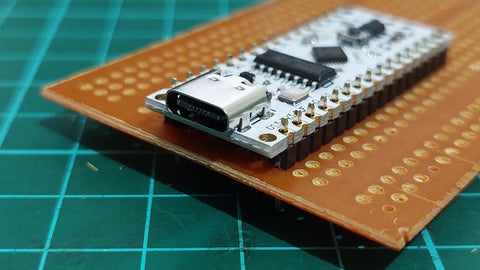
Note that all the holes on both sides are spaced at a standard 2.54mm/0.1" pitch. The castellations also meet this standard in both X- and Y-axes.
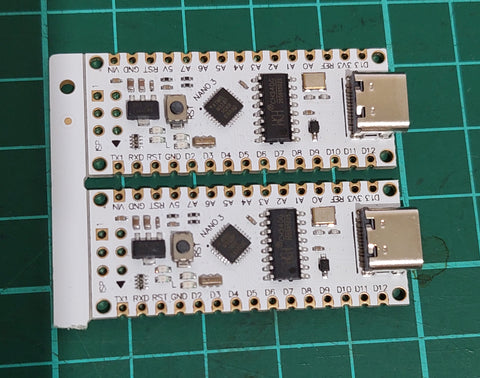
If you're awesome and ordered two or more of the boards, they may arrived in panelized form. In this situation, gently flex each board from the PCB rails until they snap off, for example:
As this board uses the ATmega328P microcontroller in the VQFP packaging, there is no A6 or A7 ADC (Analog to Digital) pins:

They are shown on the PCB, however the holes are not connected to anything. You can still solder to pins for rigidity.
The pinouts on this board match that of the usual Nano-compatible, without A6/A7 as shown below (click image to enlarge in new window):

Power Supply and outputs
The board can take power from the 5 V inside the USB-C connection, however this will, in reality, be around 4.6 V. Take note of this if using the analog input pins, as you will need to base your voltage calculations around the lower voltage. If you have a multimeter, check the voltage of the 5 V pin for your exact value.
You can also power the board by injecting your own 5 V into the ... 5 V pin (and GND). Or you can connect up to 18 V DC via the Vin pin (and GND) and the onboard voltage regulator (the AMS1117-5.0) will drop this down to 5 V for you.
To avoid overheating the voltage regulator, try to keep the external supply voltage as close to but not below 6.5 V DC. The regulator can, in theory, offer up to 1 A of current - however experience has shown that you should keep this to around 500 mA or less for cool running.
The 3.3 V pin sources current from pin four of the CH340G USB to serial converter IC. This is a bit of a hack, as the CH340G was not designed to have a secondary voltage regulator. This output is meant for use with the 3.3 V side of logic-level converters. However, you can source up to 20 mA of current from the 3.3 V pin.
Onboard LEDs
There are four LEDs on the board - a power LED which is always on when power is connected, and like almost every Arduino and compatible board - a blue LED connected to digital pin D13 and data TX/RX LEDs indicating data transfer from and to the board.
USB C Connection
Unlike other Nano-compatible boards - you will need a USB C cable back to your PC. With regards to USB drivers, MacOS and Linux users should have a plug-and-play experience.
Windows users will need to install (if you haven't already done so) the CH340G drivers. Click here for information on driver downloads.
Once your drivers are installed, connect your board to the computer. The power LED should turn on and the blue user LED should start blinking. This signifies the board is running the pre-installed "blink.ino" Arduino sketch.
Configuring the Arduino IDE
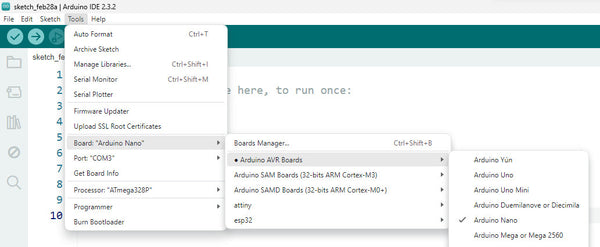
There's two things to do after opening the Arduino IDE software. First, select the board type using the Board option from the Tools menu as shown below:
Then check the Port option in the Tools menu - ensure you have selected the correct USB port.
Finally, open the "blink" demonstration sketch from the Examples > Basics options of the File menu and upload the sketch. When this completes you know your board is ready for use.
Where to from here?
You now have the basics on using your Compact Arduino Nano-compatible with USB C. If you didn't find success with your board you can always email support@pmdway.com for assistance.
And to keep up to date with new products, news, tutorials and more - we're on x, Facebook, Instagram, threads, reddit, and instructables.