LED Cube "Flower" Arrangement
from hackster.io
I, like your typical maker, love addressable LEDs. So when I needed to do an experiment involving PCB castellations, the pursuit quickly morphed into a series of small side-soldered cubes that could each mount WS2812B LEDs.
Each of these cubes takes in data, plus 5V and ground from an interface PCB on the bottom, leaving 5 light-up PCBs with a single WS2812B unit each to illuminate the sides and top. This interface PCB also passes signals on the next LED unit via an output pin, and has secondary pins for 5V and ground as well. They cubes look fantastic as tested just after 3:00 in the video below, using my JC Pro Macro 2's output functionality.
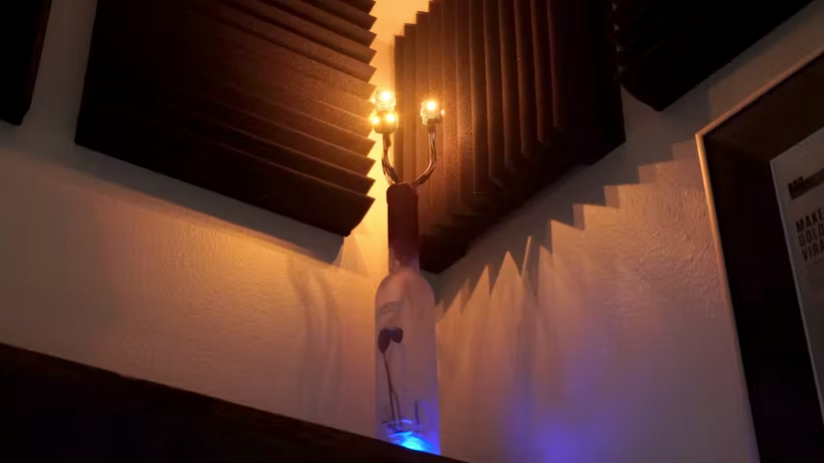
Of course, a string of square LED "bulbs" on a table is only so interesting, and for the next step in this project, I placed three in a modified wine bottle on wire "stems." For control here I used a Wemos D1 mini ESP8266 board, along with the fantastic WLED firmware that allows for a wide range of time-based lighting effects.
The one problem with using an ESP8266 is that it signals at 3.3V, which resulted in flickering since the LED power supply is at 5V. Rather than accept this situation, or use a traditional level shifter for the signal, I instead added a diode in series with the supply, dropping the voltage down to a level that the 3.3V signal could reliably control.
The results are quite pleasing, shining away nicely on a shelf in my office. It's programmed to turn off at night and change colors at noon, however, this is only skimming the surface of WLED's capabilities.Incidentally, the LED PCB shadow box that I installed in mid-2021 uses the same firmware. As shown at the very end of the video, the two light-up structures can synced for a coordinated lighting display.


Leave a comment