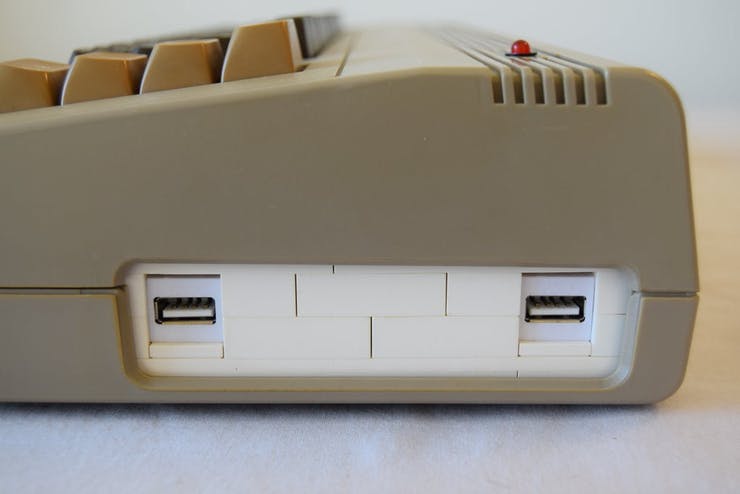
A Raspberry Pi, Arduino, and Some LEGO Bricks Revive a Commodore 64
from hackster.io
It would be quite the understatement to simply call the Commodore 64 “successful.” In fact, it is the most successful single computer of all time, with between 10 and 17 million units sold. For comparison, the ZX Spectrum, which was one of the most popular computers in the UK from the same era, sold only 5 million units worldwide.
Despite those sales figures, it can be difficult to find a working Commodore 64 at an affordable price. But if you can get your hands on a non-functional unit, RaspberryPioneer has a tutorial on how to revive it with a Raspberry Pi, Arduino, and some LEGO bricks.
LEGO bricks may seem like an odd choice, but they will allow you to build an internal structure to mount the Raspberry Pi and Arduino without having to modify the original Commodore 64 case at all. That’s probably a good thing, as retrocomputing purists get upset when people go around hacking up a piece of computer history like this.
The Raspberry Pi will do all of the actual computer stuff, and you can use whatever operating system you like. RetroPie is great if you’re interested in emulating games, while Combian64 provides a more authentic Commodore experience.
An Arduino Micro is used to connect the keyboard of the Commodore 64 to the Raspberry Pi. This will require that you connect a number of wires from the keyboard to the Arduino. But once that’s done, you can simply plug a USB cable from the Arduino into the Raspberry Pi.
The provided code will make it appear as a standard USB HID device, so no additional configuration is necessary. Finally, you can use some keystone connectors to extend and position the various Raspberry Pi ports to make them easily accessible. The result is an inexpensive way to bring a retrocomputing icon back to life.


Leave a comment